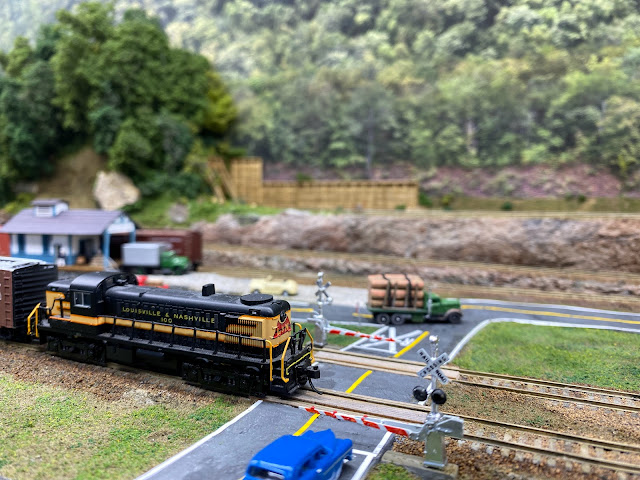
Roads in Cawood, Part 3
I received the road decals I ordered from Highways and Byways ( http://www.highwaysnbyways.net/ ) and I am quite happy with them. I wanted solid white lines down each side of the roads and a solid or dashed yellow line down the middle. On the road crossings of the main line I wanted a railroad crossing sign on the pavement. Their N-Scale Graphics Package contained a page each of yellow stipes, white stripes, railroad crossing signs and wide bars, and a page of turn indicators, school zones, stop, yield, etc.. I suspect this package is all I'll need for my layout.
In Cawood I have about 8' 8" of roads to stripe and 3 railroad crossings to mark. My roads are approximately 1-1/2" wide. Using an Xacto knife, needle nose tweezers, a stick pin, and a small ruler I worked slowly applying the decals. The stripes are nicely cut of very thin vinyl with an adhesive backing. It adheres quite well to my road way, but in a few places I added a drop of super glue to keep it down. This is especially necessary around sharp curves, where I also had to trim the stripes to make them lay down.
The railroad crossing signs are vinyl transfers that work very well. I think they really add a lot to the scene. To top off the crossing scene I added signals with protective gates from NJ International. They are static models but look nice.
So this has been a really good project that is a positive addition to the layout. The striping only took 2 afternoons. If you have highways on your layout, give the products from Highways and Byways a try. Now on to the next project.
Here are some more pictures of the completed roads through Cawood.
 |
| Highway tunnel leading to the other side of the mountain. |
 |
| Highway coming into Cawood. There will be a gas station and a few businesses on the left |


